How to add custom designs to apparel
In this guide, you will learn how to place your custom design onto clothing to create personalised apparel mockups. In the end, you will have your original clothing item, but with a custom design printed on top of it.


Clothing items tend to have curvature and it can be tricky to get a flat image to look authentic on such curved surfaces using traditional methods. In Mockover, we built a displacement map mode, which will automagically create and apply the displacement map, which will distort the pixels of your custom design to make it look like it belongs on your crushed t-shirts and jumpers.
This technique allows you to present your apparel without having the physical clothing piece printed. You can use these apparel mockup images to set up your store and start selling before you even go through the printing process.
If you wish to add your designs to non-apparel items, you should check out how to add your logo to any product.
Before we start
Before we jump into the process, here is what you will need:
- An image of your apparel (preferably in a single, monotone color so that our mapped design is more visible)
- A custom design that you would like to place onto the clothing e.g. your logo or any picture
- A web browser (preferably a laptop / desktop device for better editing experience)
- 5 minutes of your time
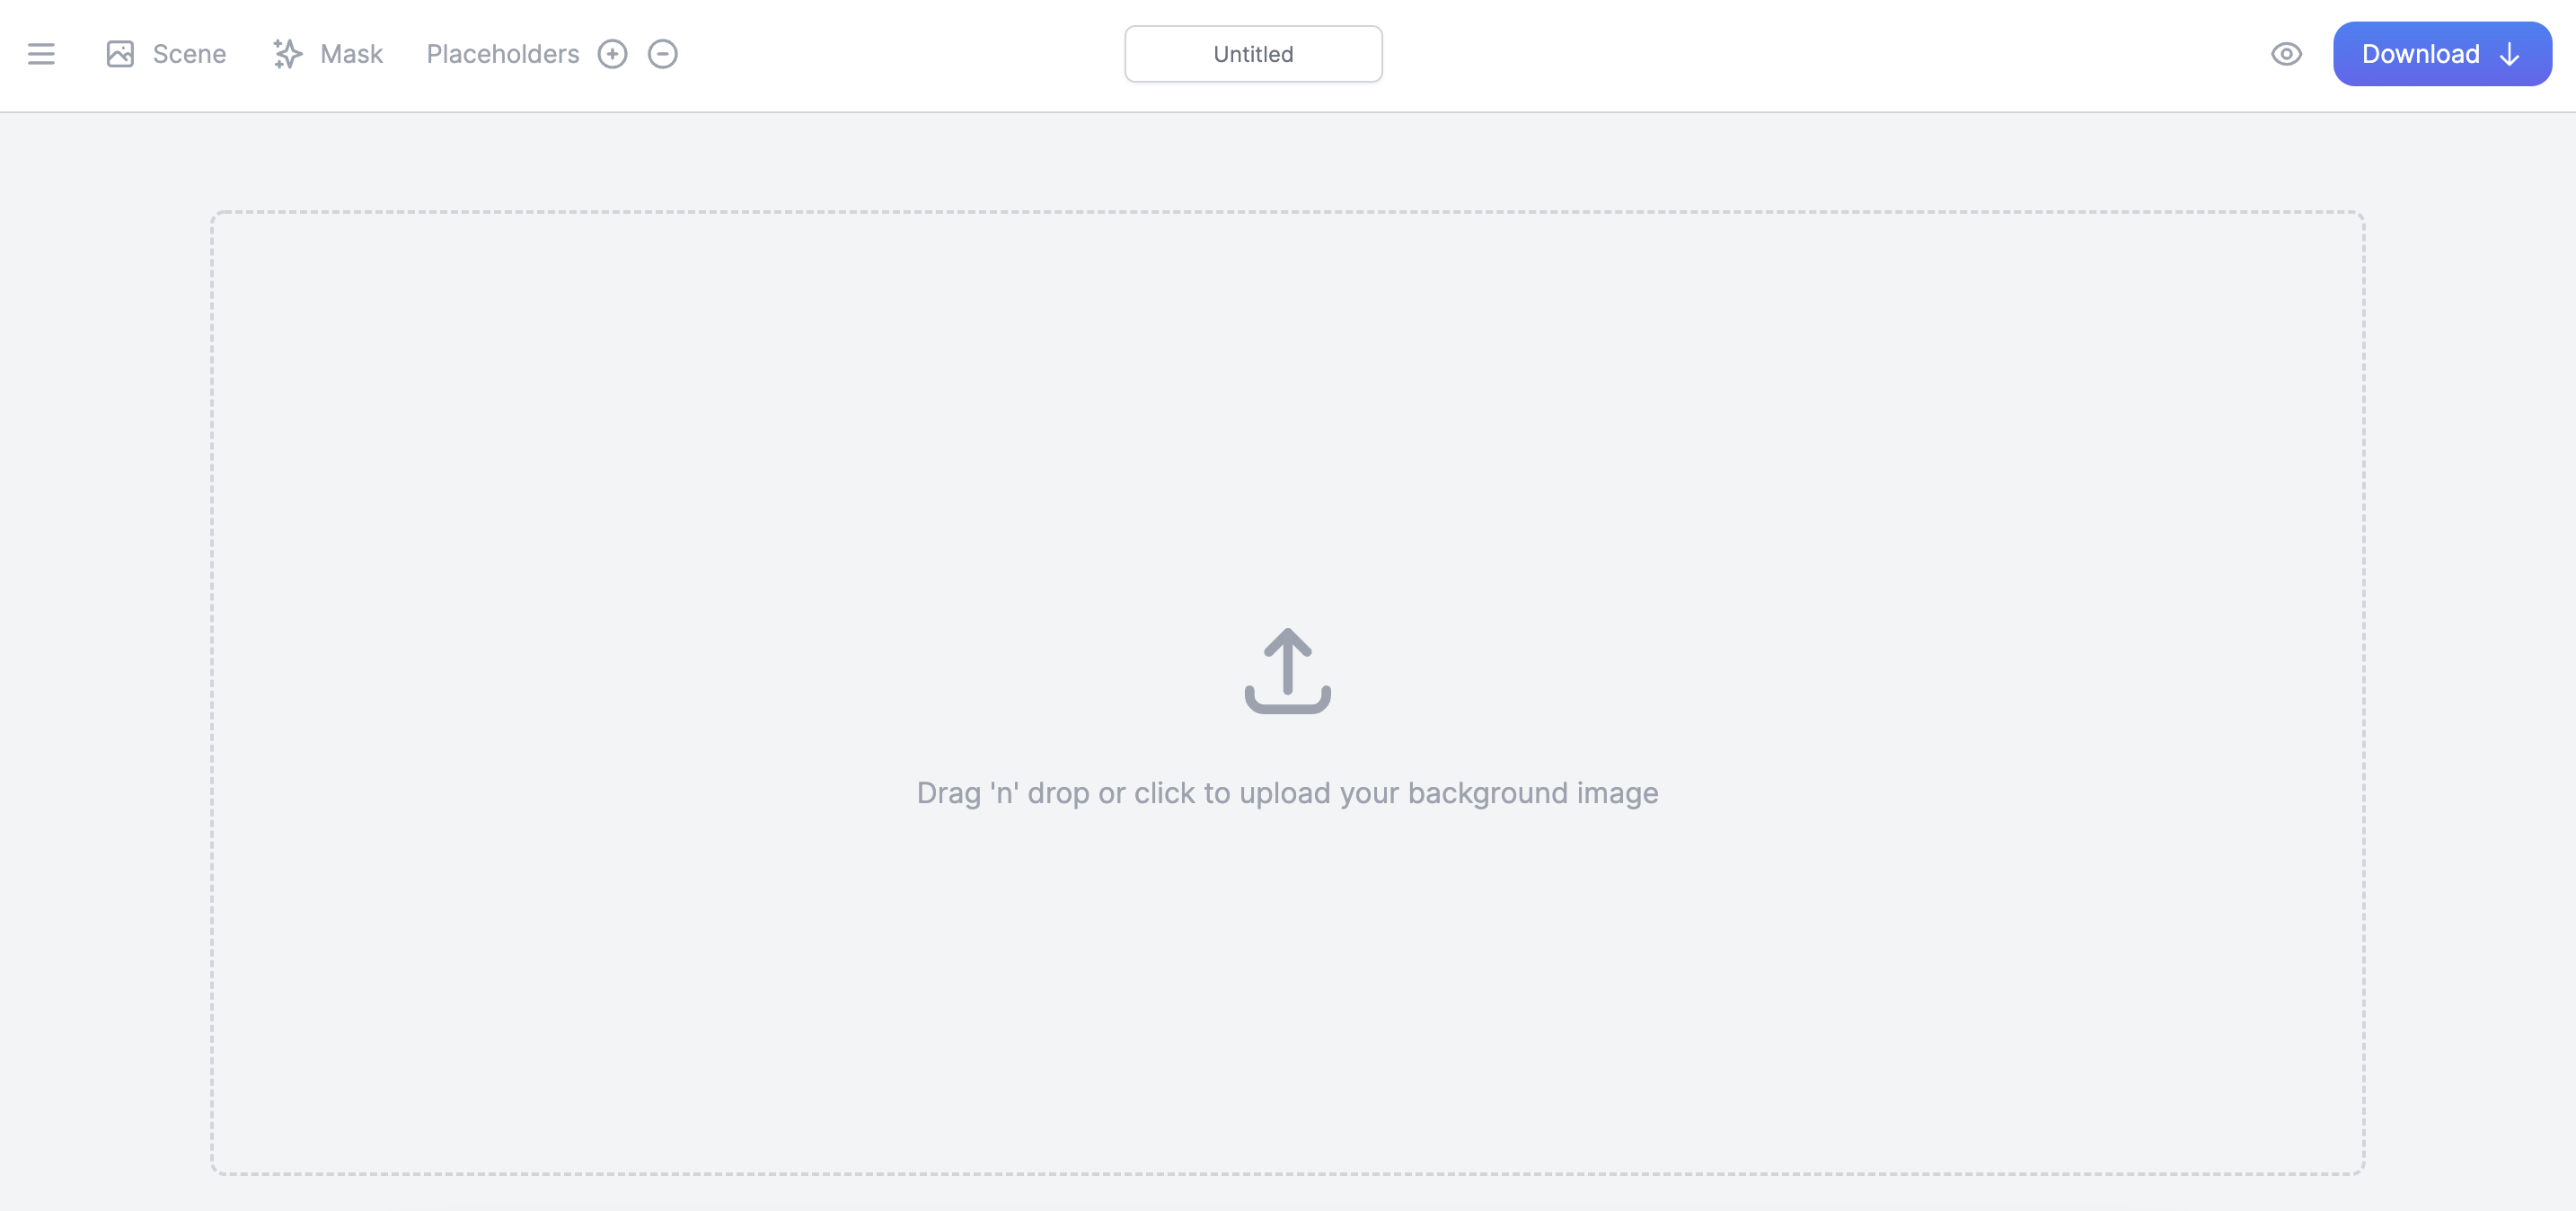
1. Upload your apparel image
Sign up on Mockover, go to your account and click + add a new template. The editor will load and will ask you to drop the image of the clothing item that you would like to cutomize and map your custom design onto.
Tip: You can search Unsplash for an appropriate image that suits your requirements.
Alternatevely, our t-shirt mockup generator has a variety of pre-made templates and examples to get you started.
2. Create a placeholder
Click on the placeholder menu item and drag the box area to the part of the clothing that you would like your custom design to appear on.
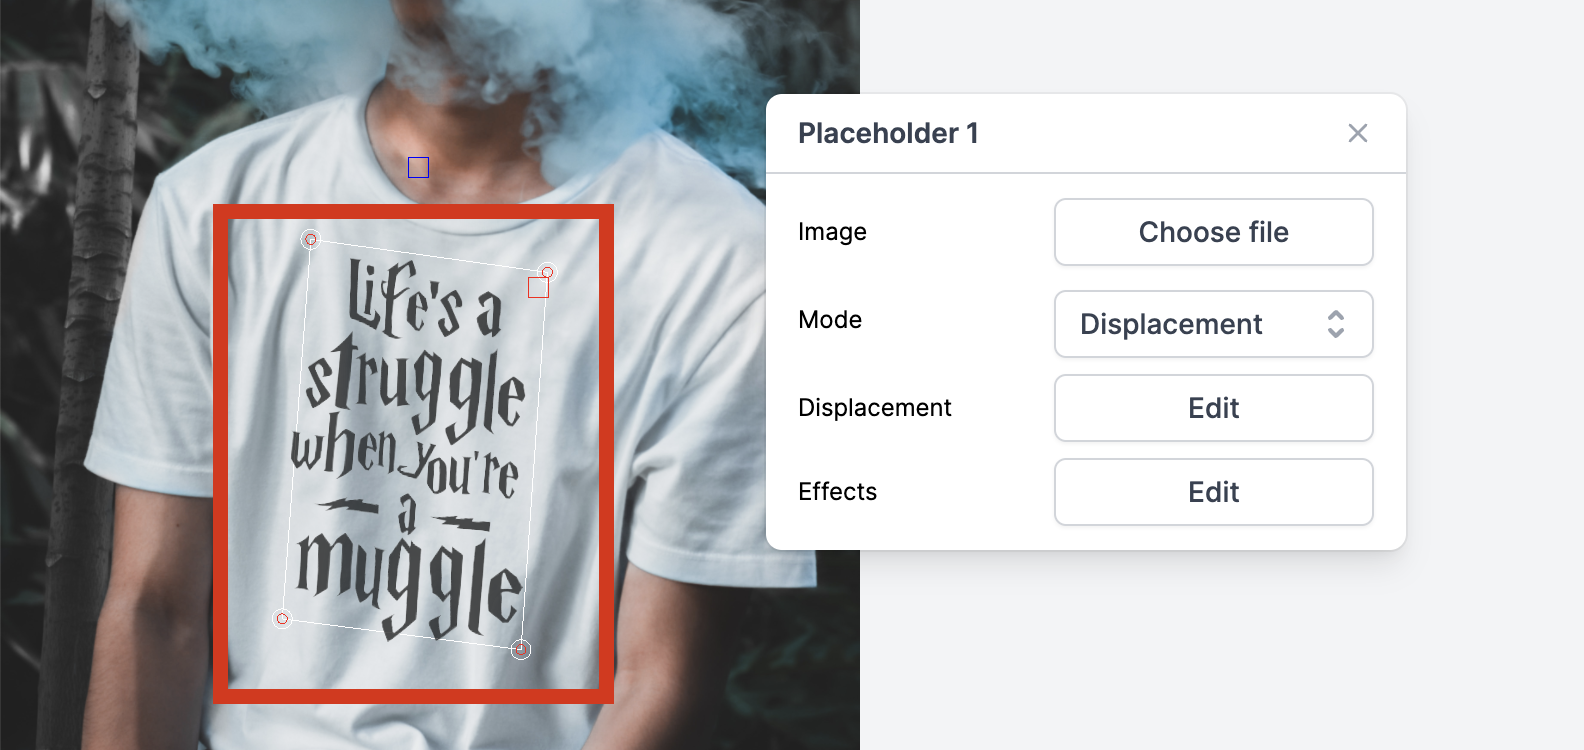
3. Select displacement mode
Change the placeholder type to displacement mode. The displace mode creates a map to distort the pixels depending on the surface of your underlaying image.
You should tweak the parameters of the displacement map to achieve an authentic blend.
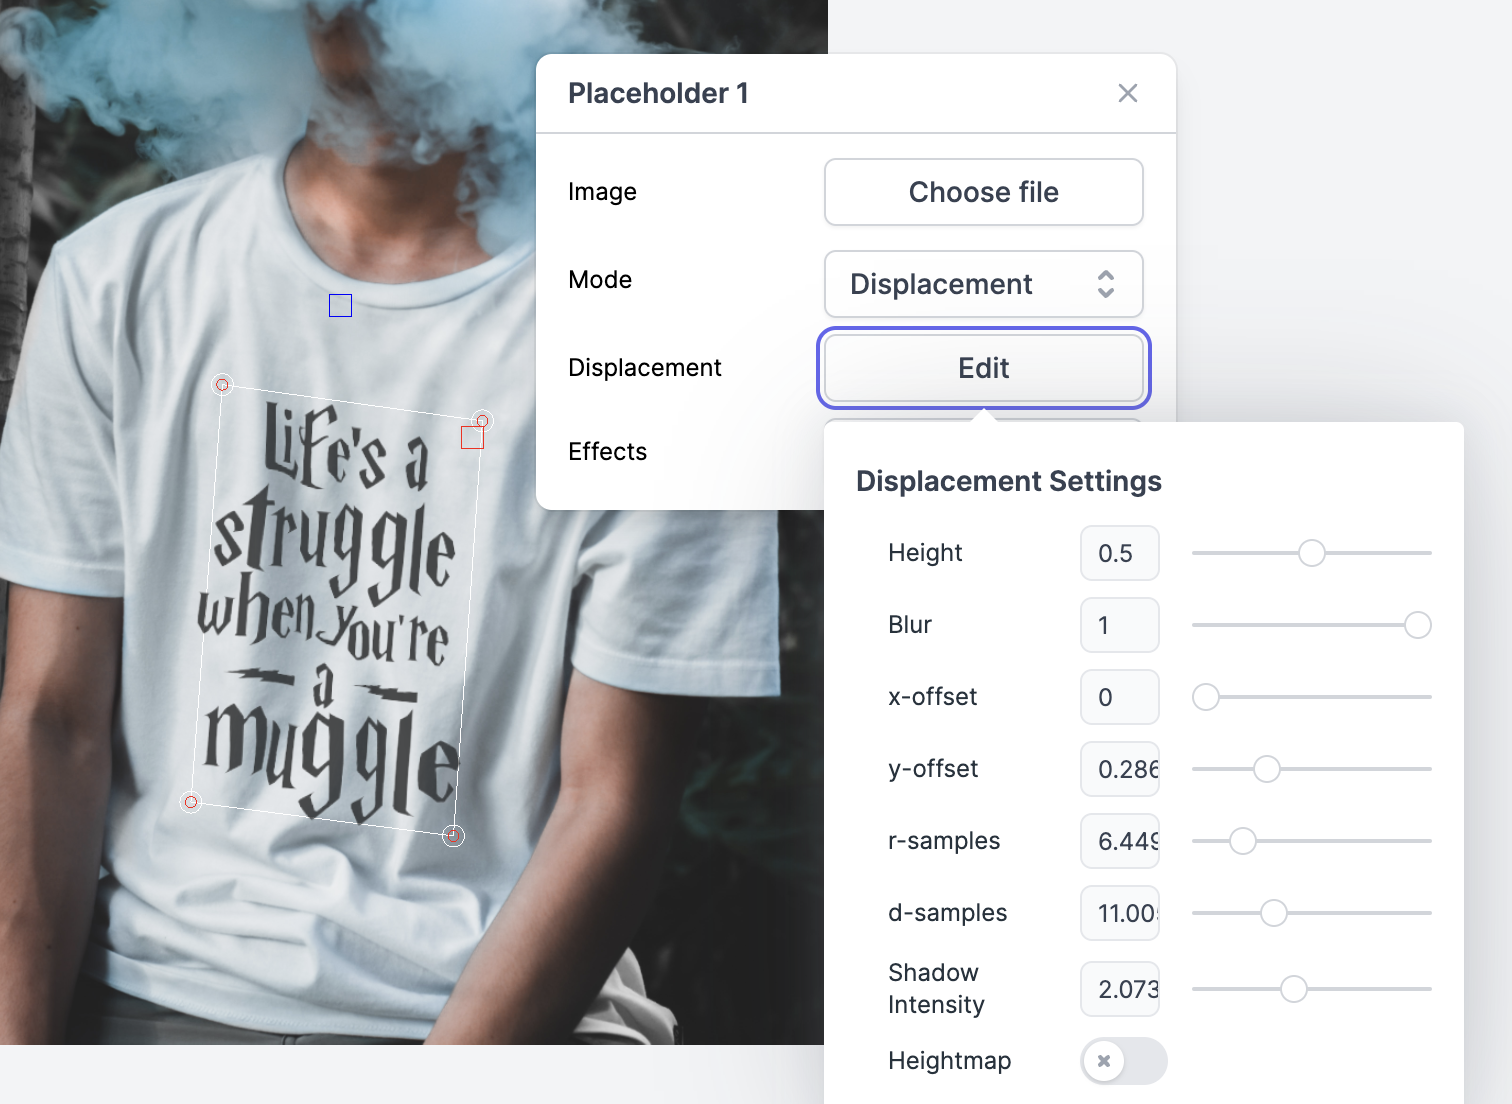
Tips:
- Turn on the height map
- Tweak offests and sampling to align the generated map to produce a high quality blending map
4. Download the result
Once you are happy with your newly looking apparel mockup, click on the download button in the top right corner to download the result.

Summary
In this guide, we covered how you can create apparel mockups to showcase your clothing line before actually going through the physical printing process.
You can use this method to create brandable product presentations and to preview how your designs would look on t-shirts, jumpers and other clothing.